Thursday, September 29, 2011
Quick Summery Sautee
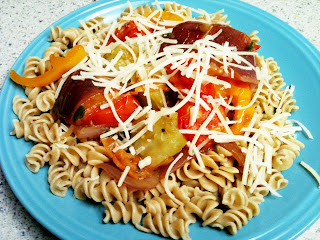
Just wanted to fire off a quick post about one of my favorite quick meals-- sauteeing a heap of vegetables, and throwing them over pasta. You don't need to spend time on a pasta sauce to make a nice, quick meal. Just grab some fresh vegetables, some olive oil, and within 10 minutes you'll be eating a hearty, summery dish that's both healthy and filling.
As it happens, I already had everything I needed in my pantry... and I wanted to get rid of it. I had a case of organic heirloom tomatoes from my local white person depot, Trader Joe's. I also had an onion and a bell pepper. Considering the only thing you pretty much ever need to make something taste amazing is onions, I had this on lock.
There is only one thing you need to know when sauteeing a medley of vegetables: cook them in order from longest cooking time, to shortest. (It's a good golden rule for sauteeing vegetables, but if you're going to make something like ratatouille, different orders need to be used, in order to blend the vegetables juices in the right order.)
After a cursory Google search, I found this handy list posted by TLC, the Schadenfreude Channel. No pictures of limbless hoarding midgets, but it does have a fairly thorough list of common household vegetables. The table doesn't have a column specifically for sauteeing, but it's fairly easy to compare the columns and items and extrapolate between the two.
In my case, I heated up a healthy wallop of olive oil to medium heat over the stove top then threw in my onions. Once they were starting to soften, I threw in the quartered tomatoes (whose juices really helped to soften everything else), followed by the sliced pepper. Season to taste. I threw in some fresh oregano and basil for an added kick. You don't want to overcook things, otherwise they'll turn into an unappetizing, brown gloop. But once it's soft, you're ready to spoon the mix over a bed of pasta, and top with parmesan. There should be plenty of liquid at the bottom of the saucepan, both from the tomato innards and the juices from the other veggies, which makes it a perfect pasta topper.
It's a fast, easy way to get rid of vegetables you've got lying around, and it's extremely filling. And it's good. Everybody wins.
Saturday, September 17, 2011
Pizza p. 191 Part Two
Alright, so a couple weeks ago, I promised that I'd write a secondary post about pizza dough a couple days later. To my credit, I actually did make that second pizza, and I had every intention of writing about it in a timely manner. But I'll be honest with you, I totally dropped the ball because I got stuck in an obsessive videogame spiral. I tried so hard to tear myself out of this black hole, but there were a lot of bad guys that needed a good strong whooping. Plus, I was saving the world from violent hooligans, which I'd argue is more or less about as important as blogging about pizza.
Anyway, I dropped the word "magic" when describing how using olive oil can prevent your dough from turning into a sad, soggy mess, but it's really just common sense. Water and oil don't mix. So if you're going to heap ingredients on a sog-susceptible dough, what do you do? Put oil on it. That's your barrier against all your ingredients, so you'll get a nice, firm dough that's crispy on the bottom. If you don't want to bother with brushing, you can just drizzle the top with olive oil and spread it with your hands.
It helps to push a few dents into the dough with your fingertips as well, so the crust doesn't puff up into a giant bubble. You see, when the pizza is heated in the oven, the air bubbles in the dough expand, forming bubbles that can get out of control. To counteract this, a lot of people "dock" the dough, meaning they prick holes in the dough with a fork or other pointy object. (You can also buy this absurd contraption, but seriously just use a fork.) But just pushing dents into the crust should deter any large bubbles from forming, since you're essentially blocking the spread of air bubbles.
This time, I followed the recommendation of The Joy of Cooking and made a prosciutto, artichoke, and olive pizza. Tip: if you're going to use canned artichoke hearts (which mostly likely you will be using), don't forget to squeeze the juice out first! Or else you're going to end up with a soppy pile of mush.
Pizza is so freaking delicious.
Thursday, August 25, 2011
Pizza p. 191
Earlier this week, I was watching the movie Charlie St. Cloud while drinking heavily, an activity that anyone who has seen the movie knows is a pre-requisite. As ludicrous as the film was, there was this one scene that cracked me up:
Zac Efron is playing catch with his dead brother, and tells him he's going to cook dinner for this girl he met. The brother says, "You should make her pizza." Zac says no. Then the brother says, "Why not? Pizza is delicious."
Pizza IS delicious. But something about the way the kid delivered the line made me laugh. I think it's because in this day and age, the word "delicious" is actually kind of archaic. Meaning, you're a lot more likely to hear someone say, "pizza is really good!" or "pizza is amazing!" or some other nondescript adjective. When someone says that something is "delicious," it's serious business. (Similarly, the only funny line in the stinker Observe and Report is when Aziz Ansari says, "Why would I [blow up the Chick-Fil-A]? Chick-Fil-A is fucking delicious!")
So yeah, Zac Efron's dead brother is totally right. Pizza is delicious. That's why I've had a hankering for pizza all day.
Luckily, it's pretty hard to screw up pizza, as long as you have two things: good dough and good sauce. You could probably make an edible pizza with a slab of Boboli and some canned pizza sauce, but it would probably taste like cardboard. Plus if you make your own pizza from scratch, you can lie to yourself and pretend it's healthy.
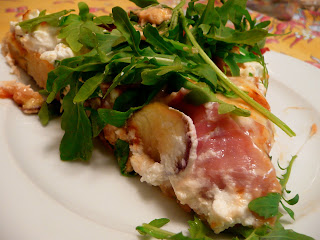
I had a strong craving for a good, hearty, pretentious pizza, so I knew exactly what I wanted for toppings-- prosciutto, figs, goat cheese, and arugula. So naturally, I headed to Trader Joe's, the one stop shop for all my liberal, NPR-pledging, middle-class, non-essential food needs. Not too surprisingly, they had everything I wanted. (They did not have yeast, although they did have about ten different kinds of organic sugar extracts.)
Good pizza dough is luckily, pretty easy to make. I say it's "easy" to make, because I literally just throw all the ingredients into my bread maker. It's probably also fairly easy to make if you have a stand-mixer with a dough hook. If you're going to make dough by hand, it's a lot more involved, although pizza dough uses mercifully few ingredients (pg. 607).
The most important ingredient (aside from the flour) is the yeast. There's a dozen ways to leaven dough and manipulate its texture, but pizza dough relies on our good friend yeast, which releases carbon dioxide into the dough once the culture is active. You can buy yeast in handy tearable packages, but I usually just buy a big jar of Fleischmann's dry yeast, which I stow in the pantry and scoop when I need it. After having taught microbiology lab for a few quarters, I can safely say with much disgust that yeast loves to grow. Once it's in the right conditions, it'll happily propagate, until you're begging it to stop.
Yeast is happiest just below body temperature (95F, or for you Canadians, 35C), so once there, it'll multiply away, eating up the sugars in your flour and belching out the carbon dioxide that makes your dough rise. But, if you're like me and you like to start with dry yeast, you need to reactivate the cultures by warming them up in water (~105-110F). You can either use warm tap water, or zap some water in the microwave for about 30 seconds, or you can be lazy like me... and just throw everything in the bread maker and hit START. My life drastically improved the second I bought my bread maker.
Mostly what's nice about having a bread maker is that you don't have to manually knead the bread and keep an eye on it while it's rising. The upside of doing it by hand is you can really control how chewy you want your crust. The more you knead, the tighter and better organized the gluten network in your dough so you'll get a nice chewy texture to go with your toppings.
But onto the sauce. It's really not that difficult to make a good, flavorful sauce, but it makes all the difference in the world. Here's the secret: celery, carrots, and onions. If it's good enough for a stew, it's good enough for a sauce. If it smells amazing enough to eat straight from the pot, you can damn right bet it's good enough for a pizza.
There's a recipe on page 562, simply titled, "Italian Tomato Sauce," but like I said, you can start it the same way you'd start a stew. Dice up some celery, carrots, onions, and parsley, and get them nice and soft with a drizzle of olive oil on medium heat. Then just ask yourself this, "What do I want my tomato sauce to taste like?" Want some basil? Throw it in. Want some thyme? Throw it in. Want some garlic? Throw it in. If you want it, just throw it in. Then all you need to do is add the tomatos. The Joy of Cooking recommends 1 3/4 pounds of fresh tomatoes (this recipe makes enough sauce for two pizzas), or the substitute for us city livin' folks-- a 28-oz can of whole tomatoes. Let the tomatoes simmer, mash 'em up with a spoon, and you are solid. Season to taste.
So now there you have it. You have a delicious pizza dough, and you have a delicious pizza sauce. Now you can add whatever you want on top. Tip: if you're going to put something like arugula on top, save it until after you pull the pie out of the oven. Otherwise you'll be stuck with some nasty pile of wilted crap that no one will want to eat.
Believe it or not, there's still a lot more I want to discuss regarding pizza, namely the preparation of the dough prior to baking, but this post is getting seriously long in the tooth. Luckily, I made enough dough and sauce for two servings, so the next time I make pizza, I'll chatter a bit about the magic of olive oil, and how it prevents your dough from turning into a big soggy mess.
I hate my pantry
As of two months ago, I am the proud renter of what is possibly the worst designed pantry in Southern California. Not a single day goes by where crap doesn't come tumbling from the shelves when I'm groping around in the dark for a condiment or pan.
Here's what the pantry looks like from the doorway. (Note, you can't actually step into that corner-shaped nook, because the bottom of the pantry is actually solid. So you have to just grab onto the edge of the pantry and lean in. The left and right-hand edges of the photo literally mark the edges of the door frame.)
It doesn't look too bad, right? Now here's what happens when you step into it a bit. Oh, what's that? It's a freakishly deep and dark pantry, which is only accessible by that impossibly tiny opening, so you'd either have to have insanely long arms, a rodent's night vision, or the needs of someone who only stores two apples at a time, and maybe a can of salt.
Just for reference, here's what it looks like without flash illuminating the inside. Great design, guys. Thanks!
Anyone else out there have the pantry from Hell?
Poaching Eggs! A Success Story
Earlier today, I posted about Gordon Ramsay's amazing and seemingly magical secret for how to make the perfect poached egg. All day, that's all I could think about. Even as my work day dragged longer and longer, all I could think of was, "I can't wait to go buy some eggs, and poach them!!" I guess we all have different ways of getting through the day.
But finally, my moment came. I was finally home, armed with a fresh carton of extra large, Grade AA "Farm Fresh" eggs. Were they actually farm fresh? Probably not. But that was the best I could do with Trader Joe's.
First things first, I cracked two eggs into little cups, so that I could easily pour them (one at a time, of course) into my whirlpool of simmering water. I couldn't help but arrange my arsenal into a dour =/ face, to mirror the trepidation I was feeling. I spent so long today thinking about poaching an egg, that if I failed in my task, my spirit would be forever crushed.
At this point, I wondered what size pot I needed. I ended up choosing a reasonably sized 3 qt. saucepan. (Afterward, I tried a 2 qt. saucepan, with comical results, but more on that later.) Just like McGee suggested, I brought the water to a rolling boil, then dropped the heat down so the water was just simmering. Then, I just started stirring the water like a madman, simultaneously terrified that I was going to splash boiling water all over myself.
What I noticed with the 3 qt. saucepan was that even if you stir the pot like crazy (I was using the same whipping motion I'd normally use on a large bowl of eggs), the whirlpool dies down really fast. Like maybe five seconds after you stop stirring, it evens out. Still, I had to try it. I got the water churning once again, as fast as I could, and the second I pulled my whisk out of the water, I slipped the egg into the eye of the whirlpool. Then I waited.
At this point, my saucepan did not look pretty. Here's what the inside of the pot looked like. I was pretty pessimistic about the outcome. But Ramsay speaks from experience, and once my three minutes of cooking were up, I reached into the water with a slotted spoon, and pulled out... an amazingly beautiful, egg-shaped poached egg. And just like he said, it looked like a smooth lump of mozzarella. I threw it into cold water immediately, and noticed that all of the raggedy scraps fall right off the egg, leaving a much smoother exterior.
And there it was! I was so proud of myself, I IMed a friend to tell him I poached an egg, and the response on the other end must have been "..." But look how good it looks! Granted... I may have let my "three minutes" turn into "four minutes" out of paranoia, so the yolk wasn't as runny as I would've liked, but I couldn't have been happier with my result.
But what happens when you use a smaller saucepan?
Ah... yeah. About that. So while I was anxiously watching the egg poach in the 3 qt., I started worrying that the pot was too big. I thought maybe if I used a smaller saucepan, the whirlpool would stay longer, thus whipping the egg white around the yolk longer. Well, it does. But it doesn't give the desired result. With my 2 qt. saucepan, the second I dropped in my egg, the yolk got caught up in the tumult, dragging the entire egg askew. The result was a (still yummy) strangely misshapen egg that looked kind of like Africa, which I photographed on the delicious carcass of my former, prettier egg.
vs.
Lessons learned:
1. Gordon Ramsay is always right.
2. Use at least a 3 qt. saucepan. You could probably use a deeper one, but the diameter of the 3 qt. seemed just right.
3. Three minutes means three minutes. If you leave it in too long, the yolk starts to cook too much.
4. I POACHED AN EGG!!!!!!!!!!!!!!!!!!!!!!!!!!!!!!!!!!!!
But finally, my moment came. I was finally home, armed with a fresh carton of extra large, Grade AA "Farm Fresh" eggs. Were they actually farm fresh? Probably not. But that was the best I could do with Trader Joe's.
First things first, I cracked two eggs into little cups, so that I could easily pour them (one at a time, of course) into my whirlpool of simmering water. I couldn't help but arrange my arsenal into a dour =/ face, to mirror the trepidation I was feeling. I spent so long today thinking about poaching an egg, that if I failed in my task, my spirit would be forever crushed.
At this point, I wondered what size pot I needed. I ended up choosing a reasonably sized 3 qt. saucepan. (Afterward, I tried a 2 qt. saucepan, with comical results, but more on that later.) Just like McGee suggested, I brought the water to a rolling boil, then dropped the heat down so the water was just simmering. Then, I just started stirring the water like a madman, simultaneously terrified that I was going to splash boiling water all over myself.
What I noticed with the 3 qt. saucepan was that even if you stir the pot like crazy (I was using the same whipping motion I'd normally use on a large bowl of eggs), the whirlpool dies down really fast. Like maybe five seconds after you stop stirring, it evens out. Still, I had to try it. I got the water churning once again, as fast as I could, and the second I pulled my whisk out of the water, I slipped the egg into the eye of the whirlpool. Then I waited.
At this point, my saucepan did not look pretty. Here's what the inside of the pot looked like. I was pretty pessimistic about the outcome. But Ramsay speaks from experience, and once my three minutes of cooking were up, I reached into the water with a slotted spoon, and pulled out... an amazingly beautiful, egg-shaped poached egg. And just like he said, it looked like a smooth lump of mozzarella. I threw it into cold water immediately, and noticed that all of the raggedy scraps fall right off the egg, leaving a much smoother exterior.
And there it was! I was so proud of myself, I IMed a friend to tell him I poached an egg, and the response on the other end must have been "..." But look how good it looks! Granted... I may have let my "three minutes" turn into "four minutes" out of paranoia, so the yolk wasn't as runny as I would've liked, but I couldn't have been happier with my result.
But what happens when you use a smaller saucepan?
Ah... yeah. About that. So while I was anxiously watching the egg poach in the 3 qt., I started worrying that the pot was too big. I thought maybe if I used a smaller saucepan, the whirlpool would stay longer, thus whipping the egg white around the yolk longer. Well, it does. But it doesn't give the desired result. With my 2 qt. saucepan, the second I dropped in my egg, the yolk got caught up in the tumult, dragging the entire egg askew. The result was a (still yummy) strangely misshapen egg that looked kind of like Africa, which I photographed on the delicious carcass of my former, prettier egg.
Lessons learned:
1. Gordon Ramsay is always right.
2. Use at least a 3 qt. saucepan. You could probably use a deeper one, but the diameter of the 3 qt. seemed just right.
3. Three minutes means three minutes. If you leave it in too long, the yolk starts to cook too much.
4. I POACHED AN EGG!!!!!!!!!!!!!!!!!!!!!!!!!!!!!!!!!!!!
Wednesday, August 24, 2011
Poaching Eggs?
I was watching "Gordon Ramsay's F Word" this morning while I was sipping on my coffee. For those of you who've never watched it, it's surprisingly pleasant. Ramsay's a lot more docile than he is on "Hell's Kitchen," and although he does his fair share of snipping at his guest chefs, he also spends a lot of time educating viewers on different things. Sometimes he'll present simple recipes (of course, what Ramsay calls "simple" is a 2 hour endeavor for most of us) or go to the local fishmarket. One episode saw him catching auks off a craggy cliff in Iceland, which sounds about 100x more fun than catching butterflies.
Anyway, in this morning's episode, he was talking about how to make the perfect poached eggs.
I don't know about you, but I can't poach eggs. Whenever I drop the egg in, the whites immediately splatter into an unsightly nest of white goop, and then things start foaming like crazy until I'm scrambling around for the heat dial. I know they sell little egg-shaped poaching dishes that are supposed to contain the mess, but I've never wanted to be That Guy that bought a set.
Being curious, I wanted to see what McGee and Rombauer recommended. Turns out, essentially the same things (Ramsay has a completely different and utterly brilliant technique that I'll share later). Perfectly poached eggs rely on the coagulation of the egg white, which has an insanely high protein content.
1. If you use fresh eggs, the whites are more likely to keep their shape.
2. By turning down your boiling water to a simmer, you won't get that nasty turbulence that shreds your egg whites into a pathetic splotch. (FYI, this tip does NOT help me. My eggs, simmering water or not... still tear themselves into a wretched mess.)
3. If you add salt and vinegar to the water, it helps coagulate the protein faster. Then again, McGee adds that this also tends to shred the egg whites, which kind of defeats the purpose, it seems.
Basically you have to use magic to poach an egg.
Here's where Gordon Ramsay comes in.
Once the water is at a simmer, he WHISKS the water, so you have this whirlpool. Then while the water is still swirling, he slowly pours the egg into the whirlpool, so that the egg whites wrap around the yolk, kind of like how those cotton candy machines wrap the candy around the paper sticks. The result (or at least, his result) is a perfectly egg-shaped white lump that looks like a smooth dollop of mozzarella.
Ramsay also advises directly plopping that egg into ice water, to firm up the whites and hold the shape.
Actually, at this point, I was curious whether or not he then reheated the egg before serving it. Putting it in ice water makes sense, but both McGee and Rombauer strongly advise to soak the egg in 150F water for 15 minutes, to kill any salmonella that might be lurking about. But since Ramsay put the poached egg into a hot soup, maybe he did reheat the egg before serving...
Anyway, it sounds like a really neat trick, and I'm really curious how well it works for amateurs like me. I'm fresh out of eggs, but I'm going to grab a carton on the way home from work and try it out. I'll let everyone know how well(???) it works.
Tuesday, August 23, 2011
Roast Chicken (I), p. 424
My mom always had a knack for cooking. I've never seen her open a recipe book, but everything she puts on a plate is delicious. When I first moved to California for grad school, my mom came out with me to help me set up my apartment. That first night, we drove to the Albertsons and picked out a nice, plump chicken for roasting. I'm not sure what she did to the bird-- from my vantage point it just looked like she waved her hands over it a few times-- but all I remember is that by the time she pulled it out, it was crispy on the outside, and amazingly juicy on the inside.
But unlike my mother, who's cool and poised when she cooks, every single time I've tried to roast a chicken, a zillion questions run through my head. What do I put on it? What kind of pan do I put it in? What direction should the chicken be facing? What side should be up? Do I have to put foil on it? How high should I set the oven? How long should I roast it? What the hell am I supposed to do with this meat thermometer????
After wringing my hands for a while, I inevitably pull out the ol' Google and type in, like a fool, "ROAST CHICKEN OVEN".
Am I the only one who can't reliably roast a chicken without checking a recipe every time? You'd think this would be an incredibly easy task. My mother could perfectly roast a chicken with her eyes closed, while juggling flaming hula hoops. Or maybe that's a skill set that you magically inherit once you push a baby from your loins.
The Joy of Cooking recommends three different ways to roast a chicken. The easiest one only involves three ingredients: salt, pepper, and butter. It sounds easy enough, but it turns out, roasting a chicken-- and making it taste good-- is hard! Even picking a chicken is hard! When I thumbed through the poultry section of The Joy of Cooking, all these crazy words were popping out at me: broiler!, capon!, fryer! Wait, what? Was I still in the chicken section?
McGee to the rescue.
Apparently a "broiler" (also called a fryer!) describes exactly what you ought to do with that particular bird. Broilers are for broiling. They max out at about 3.5 lbs, so they cook fast using high heat methods. But roasters... they're for roasting. These chickens are allowed to live twice as long as their broiler brethren, and thus weigh twice as much. And the best part is that they're insanely cheap. I went to the store and picked out a fat, heavy 4.5 lb chicken and it was only $5. You can't get anything in Orange County for $5! My wallet actually smiled. But, my challenge was just starting.
The Joy of Cooking has an incredibly lengthy section detailing just how hard it is to cook a whole bird. It's full of warnings about how the breast and the legs cook differently, and there is seriously an entire chapter devoted to different ways of combating this. A few of them involved flipping the chicken in different ways, one of them had some kind of soaking method, one of them involved a syringe. McGee had a few dozen suggestions of his own, most of which looked daunting, time-consuming, and definitely... not something I felt ready for.
Yikes. Never again will I underestimate the power of a roasted chicken. All my life, I thought you could just pour some oil on it and throw the damned thing in the oven.
Luckily, The Joy of Cooking provided me with a much easier alternative-- a roasting rack. I had one sitting around that an old roommate had left behind, and even though I'm 99% sure it's for cookies, I thought, what the hell! Let's put a chicken on it! And you know what? It worked. I put the roasting rack in a shallow roasting pan, and it propped up the chicken (breast up) enough so that it wasn't just sitting in its own released fats, and it let the hot air reach under the chicken so that it cooked evenly.
Preparing the chicken
What the cookbooks don't tell you is that if you rub melted butter on a cold, refrigerated chicken, that butter turns solid really fast. My butter/salt/pepper mix started glooping the second I slapped a handful on the chicken, and there it sat. I assume this would be mitigated if I had actually let the chicken warm up a bit, but the damage was already done. I figured the butter would melt once it hit the oven anyway (AND I WAS TOTALLY RIGHT! YEAH!!!!!).
Roasting
Here's a quick factoid about me: I work in a protein crystallography lab. On average, we probably grow around 20 liters of E. coli a week. Concentrated, that's probably enough to frost a few cakes. So I'm very, very careful when it comes to making sure meat is heated to a safe temperature. I already work with bacteria... the last thing I want to do is eat a giant mouthful of it. So that's why you need to hit a certain temperature. The Joy of Cooking has this rule of thumb: cook until a meat thermometer jabbed into the thigh reads 165-170F. By the time you take it out, it'll keep cooking until it slowly reaches 180F.
Now, why 165F? That is a damned good question, and one that I never really thought about until now. It seems as though it's 2-fold.
1. BACTERIA. E. coli remains alive and kicking until 155F. The last thing I want to do after eating a fine meal is spend the entire night screaming in pain, so this makes a lot of sense. In fact, that's a good number to keep in mind. 155F = No E. coli. 10 degrees here and there doesn't sound like a lot, but then I learned this: Salmonella positively thrives at temperatures up to 140F! So, since we're working with chicken here...
2. Juicy, juicy legs. After flipping through the meat section in McGee, I stumbled up on this neat fact. Because the red meat chicken legs is packed with connective tissues, it doesn't really break down until it hits 165F, otherwise resulting in meat that's more chewy than juicy. I was a little impatient and kept opening the oven to check my chicken thighs, which I'm sure slowed down the process a little, but eventually I hit the number I wanted. I was rewarded with amazing drumsticks that oozed with chicken juices.
Another thing about the roasting: the recipe asks for you to preheat the oven to 450F. Then once the chicken is actually inside the oven, you're supposed to drop the heat to 350F. McGee tells me this two-stage roasting process does two things-- first, that blast of 450 browns the skin nicely and seals the meat from the outside (trapping all the goodness on the inside), but lowering it to 350 lets the chicken cook more gently, so it doesn't dry out as quickly. What this gave me was a chicken with amazingly crisp skin, but meat that gushed with clear, hot, amazing juices when I cut into it.
So at the end of the day, I was really proud of myself. Roast chicken sounds trivial, but I've never gotten it perfect before. The chicken that I pulled out of the oven was amazing. It was flavorful and moist, and the friend I had over for dinner refused to believe that I only used salt, pepper, and butter. But the secret might actually be in the oven.
Oh, one quick confession? I still can't carve a chicken.
The Simple Joy of Cooking
A few years ago, my (now ex-) boyfriend bought me a copy of Harold McGee's On Food and Cooking: The Science and Lore of the Kitchen. For years, I never cracked it open, mostly because he was always smug in his confidence that I would like it, and I didn't want to give him the satisfaction of being right. It's small wonder that our rocky relationship eventually sputtered to a merciful end a year later.
It wasn't until I was moving a couple months ago that I unearthed my copy of McGee again. I had always heard good things about it-- my current roommate TAed a food science class where On Food and Cooking was the primary text, and she found it so riveting that she squirreled away a copy at the end of the quarter. So with some trepidation, I finally opened the book.
My goodness.
It's seriously one of the most fascinating books I've ever read in my life (and I'm glad my ex isn't around to hear me admit it). For the first time in my life, I finally understood the whys and hows of cooking. For the first time, I thought to myself, "Hey, if I actually learned why I was doing the things each recipe called for, I might actually figure out how to cook!"
Being the nerd I am, I desperately want to tell everyone about the things I'm learning, and I want to ask the questions that no one really thinks about when they're pulling out a recipe. And because I have a computer, I want to foist that upon the world, readers or not.
So here I am, with two of my favorite books: McGee in one arm, and the evergreen classic in the other, Irma Rombauer's The Joy of Cooking (75th Ed). Here's to hoping I learn something.
Subscribe to:
Posts (Atom)